I have a delightful toddler who loves to explore. His curiosity, problem-solving ability, and tenaciousness make me smile. These qualities are going to be tremendous assets as he grows into adulthood. Now, however, these qualities are inconvenient for mommy. But instead of discouraging them, I'm making allowances for them. This year, I'm not displaying my beautiful, and often expensive and breakable, Christmas decorations that are leftovers from my time as a money-earning single or childless newly-wed. Why set myself up for heartbreak when the likelihood of my favorite things getting destroyed is so great? And now that our family is on one income, purchasing all new decorations in non-breakable versions just wouldn't fit into the budget this year.
But that's okay! Lucky for me, and for many of you, I'm sure, there are inexpensive alternatives that can be easily made that are making my home festive this year. This is the first installment of my "Broke for Christmas" series. Follow my blog to read more!

When preparing for this project, I was transported back to my childhood when I loved to make snowflakes out of wide-ruled school paper and then give them to my mother. From my perspective now, they were most certainly terrible but my mom always appreciated the thoughtfulness of her sweet baby girl. I love how the Christmas season always reminds me of great childhood memories.
Although it took some attention to detail, this project was cheap, easy, and FUN. I was able to complete it over the course of two or three days while my precious little boy was down for his naps.

Necessary Supplies

Grab a bunch of coffee filters and wet them enough so they lose their coffee brew basket shape. Carefully wring them out, extracting as much water as you can without tearing the filters. Then gently press the stack back into its original circular shape, removing as many large wrinkles as you can.

Place the hot iron on the edge of the wet stack so it's easier to separate each filter. You may need to repeat this step several times as you go.

As you separate each filter, iron it flat to dry it. Don't feel you need to make it 100% wrinkle-free. Some small wrinkles will add character. And you're going to add crease marks later as you fold them, so don't make this step too tedious.

Next, fold each coffee into eighths individually. Take one filter, fold in half once, fold in twice, and then fold in half three times. I recommend folding all of your flattened filters at once and tossing them into a small box, basket, or bag. It will make the next step go a little more quickly.


I don't recommend unfolding each snowflake at the same time. They can get tangled and tear more easily than you would think. I only did it so you could see how weird-looking cuts can look so beautiful when the snowflake is unfolded. I suggest you store them in a box, basket, or bag so you can quickly put this project away if your attention gets called elsewhere. Unfold each snowflake as you're ready to hang it.

Pretend this pen is a curtain rod. I found it to be much easier to assemble each strand while standing at the window. If you sit at the table, you run the risk of tangling the garland and/or messing up the spacing between each snowflake.
Thread your needle as normal and tie the ends of the thread into a knot. Loop the doubled thread around the curtain rod and put your needle between the two individual pieces of thread at the knot. Gently pull to tighten. When finished, it will look like this:


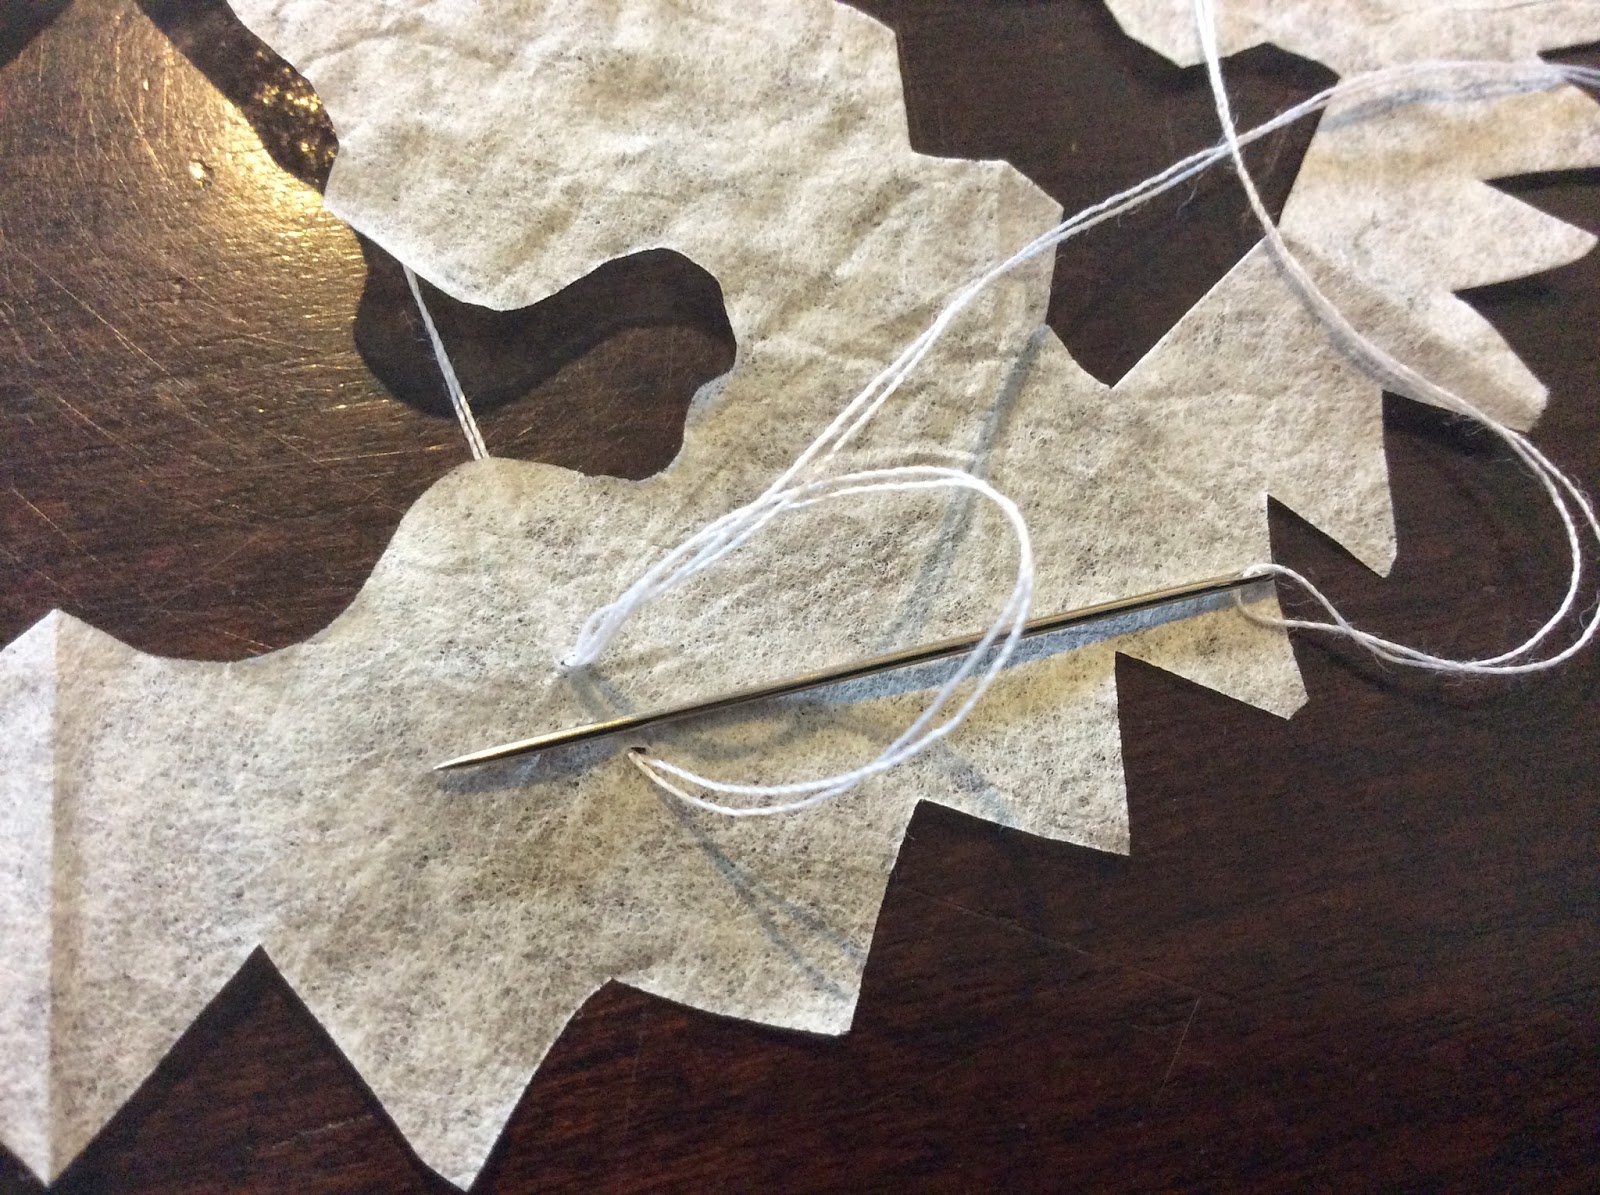
Now, begin to attach each snowflake by sewing it. On the top of each snowflake, run the needle through twice and gently pull the thread through.

And then do it again using the same holes. This will keep each of your snowflakes in place as you hang them vertically.

Next, sew the thread through the center of the snowflake...

...and then through the bottom. This will keep the snowflakes from drifting side-to-side and help them gently twist as air circulates around them.

Repeat this process with each snowflake down the line. Do the same loopy stitch at the top of each snowflake to keep it in place on the line. If you have a snowflake with a cut-out center, sew through the top and the bottom of the hole.
When you get to the bottom, tie a knot at the bottom by making a loop and threading the needle through it. Do this twice in the same place to make sure the knot holds.

And voilà! You're done. :o)
Notice the imperfect spacing between snowflakes two and three. If I had assembled this while it was attached to the window, this mistake would've been less likely.
Check back with me to see how the rest of my Broke for Christmas decorations develop. Up next: read my tips on how to make an inexpensive cranberry garland.
Did you like this post? Please share it on Facebook and then add it to your Pintrist collection!
But that's okay! Lucky for me, and for many of you, I'm sure, there are inexpensive alternatives that can be easily made that are making my home festive this year. This is the first installment of my "Broke for Christmas" series. Follow my blog to read more!
When preparing for this project, I was transported back to my childhood when I loved to make snowflakes out of wide-ruled school paper and then give them to my mother. From my perspective now, they were most certainly terrible but my mom always appreciated the thoughtfulness of her sweet baby girl. I love how the Christmas season always reminds me of great childhood memories.
Although it took some attention to detail, this project was cheap, easy, and FUN. I was able to complete it over the course of two or three days while my precious little boy was down for his naps.
Necessary Supplies
- Coffee filters for standard-size drip coffee makers
- Iron
- Scissors
- Sewing needle
- White thread
Grab a bunch of coffee filters and wet them enough so they lose their coffee brew basket shape. Carefully wring them out, extracting as much water as you can without tearing the filters. Then gently press the stack back into its original circular shape, removing as many large wrinkles as you can.
Place the hot iron on the edge of the wet stack so it's easier to separate each filter. You may need to repeat this step several times as you go.
As you separate each filter, iron it flat to dry it. Don't feel you need to make it 100% wrinkle-free. Some small wrinkles will add character. And you're going to add crease marks later as you fold them, so don't make this step too tedious.
Next, fold each coffee into eighths individually. Take one filter, fold in half once, fold in twice, and then fold in half three times. I recommend folding all of your flattened filters at once and tossing them into a small box, basket, or bag. It will make the next step go a little more quickly.
In the words of that sweet old lady from the movie The Rainmaker, cut, cut, cut! Keep a trash can nearby to sweep scraps into to keep your workspace tidy, and do this step in a few different sittings if you feel you're getting stuck in a rut. Your finished product will look its best if you have several different styles of snowflakes: jagged, wavy, curvy, loopy etc. You can get pattern ideas from Pintrist, or you can wing it and make each snowflake your own. I chose the latter. I preferred to put my own unique mark on each snowflake. It was fun.
I don't recommend unfolding each snowflake at the same time. They can get tangled and tear more easily than you would think. I only did it so you could see how weird-looking cuts can look so beautiful when the snowflake is unfolded. I suggest you store them in a box, basket, or bag so you can quickly put this project away if your attention gets called elsewhere. Unfold each snowflake as you're ready to hang it.
Pretend this pen is a curtain rod. I found it to be much easier to assemble each strand while standing at the window. If you sit at the table, you run the risk of tangling the garland and/or messing up the spacing between each snowflake.
Thread your needle as normal and tie the ends of the thread into a knot. Loop the doubled thread around the curtain rod and put your needle between the two individual pieces of thread at the knot. Gently pull to tighten. When finished, it will look like this:
Now, begin to attach each snowflake by sewing it. On the top of each snowflake, run the needle through twice and gently pull the thread through.
And then do it again using the same holes. This will keep each of your snowflakes in place as you hang them vertically.
Next, sew the thread through the center of the snowflake...
...and then through the bottom. This will keep the snowflakes from drifting side-to-side and help them gently twist as air circulates around them.
When you get to the bottom, tie a knot at the bottom by making a loop and threading the needle through it. Do this twice in the same place to make sure the knot holds.
And voilà! You're done. :o)
Notice the imperfect spacing between snowflakes two and three. If I had assembled this while it was attached to the window, this mistake would've been less likely.
Check back with me to see how the rest of my Broke for Christmas decorations develop. Up next: read my tips on how to make an inexpensive cranberry garland.
Did you like this post? Please share it on Facebook and then add it to your Pintrist collection!